Trust and Bread

I’ve fallen pretty hard for Jim Lahey. I can’t stop telling people about him: family, coworkers, complete strangers. He’s the guy that developed the one-pot, no kneading bread method that yields rustic rounds reminiscent of the bread Jim discovered in small towns outside of Rome. His theory is that you work the dough less but let it rise longer and it develops a structure that’s just as strong as more arduous recipes. It’s as easy as mixing a few ingredients in a bowl, letting them rise for 14-18 hours, and baking the round in a Dutch oven. That’s it. Now bread is one of those things that, for the most part, I’ve stayed away from because I’ve heard how difficult and moody it is. Of course I did make those english muffins and the recent blackberry cornmeal muffins, but let’s just say I’ve steered clear from yeast. Until now. I think I may be an official bread-baking convert. Trust me on this–you will be, too.
First, a quick word on trust. I learned a little something about it this week. I was at my favorite yoga class and the teacher decided it’d be a great idea to end class with a full bridge pose from a standing position. For all of you non-yogis, a full bridge (or wheel) is when you’re lying on your back, bend your knees and have your feet flush to the ground, and push up into a half-moon shape. Now if you do the pose from a standing position, you essentially look back, lean back, arch back…all the way down until your hands hit the floor. Oh boy. My mind started racing for reasons I may need to leave class early. What sudden emergency could I feign? People started to partner up so they’d have a spotter. Then all of my fellow classmates starting going about the pose like it was as easy as tying their shoes. I started to panic a little and made up some excuses to my partner–then from across the room I hear my teacher saying “Stop thinking, Megan. Just go, go, go. Your body’s strong enough. Your mind’s holding you back.” I took a deep breath and I went, went, went. I stopped trying to picture myself going down towards the ground and stopped trying to envision my form or think about how much it’d hurt if I fell on my head. Truthfully, I did it at that point more because everyone in class was watching me than for any other reason–but sure enough, my hands hit the solid ground and I was in the pose. Kind of floating there, actually.
And so it is with this bread–don’t stress about it. Don’t think about it at all, actually. Just follow these steps and, like the beauty of a good recipe or the instructions of a powerful teacher, the result will come. Whether you’re dealing with a full standing bridge in yoga or a round of the most beautiful, rustic round of bread you’ve ever seen, sometimes it helps to just turn off your mind and go. Move forward. See what happens and trust that it will.
You can do this. Here’s how it’ll go: First you mix some water, yeast, flour, and salt together real quick-like, cover it and let it rise. This is the first rise. Then you’ll wrap it in a towel for a second rise:
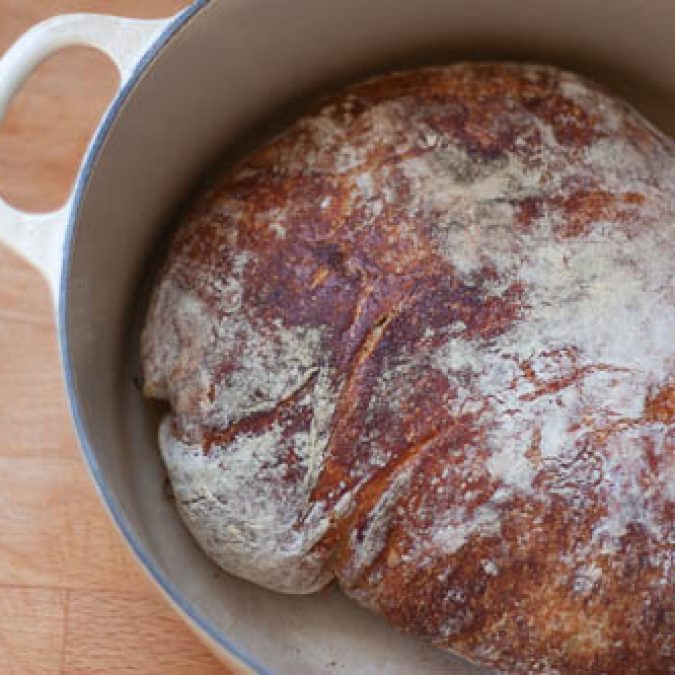
 Then you place the round of dough in a preheated pan (I use my Le Creuset) and pop it in the oven.

A half hour later you take off the top, let it brown for 15-30 more minutes…and voila:
While you may want to cut right into the hot round of bread, Jim talks about the singing that occurs right when you take your loaf out of the oven. It’s a slight whistling noise that happens due to the difference in temperature, and it’s actually a critical part of the final stages of the bread cooking. So don’t cut it. Leave it to cool, but have some soft butter on hand so that when you do slice it, you’ll be ready for action. Maybe you’ll be smiling like a fool and call your mom to tell her how awesome the bread looks, tastes, feels–how much you love Jim Lahey. Maybe you’re an old-hat at this baking thing and this is no big deal for you. If that’s the case, I challenge you to a standing bridge pose.
Rustic Whole Wheat Bread
- Yield: One 10-inch round
- Prep time: 15 mins
- Cook time: 50 mins
- Total time: 1 hr 5 mins
Please note that the rising times for this bread aren’t indicated in the time breakdowns above – the first rise is almost a full half day, so plan ahead.
I played around with the flour ratios here, adding a bit more whole wheat flour than the recipe calls for and decreasing the amount of bread flour. I wanted to get as close to a true whole-wheat bread as possible. Jim encourages experimentation, so I took him up on his offer (although he does warn against using 100% whole wheat flour as it results in a gritty, tough bread). As far as specific notes, if you’re using a Le Creuset pan, the little black knob is not oven-safe up to 475F, so you must unscrew the black knob, place the screw back in (to cover up the hole) and proceed with the baking. This is simply to save the top of your Le Creuset. A cast-iron pan like Lodge wouldn’t have this issue.
Adapted from: Jim Lahey’s My Bread
Ingredients
Equipment: 4 1/2 - 5 1/2 quart- heavy pot
For the Bread:
Instructions
In a medium bowl, stir together the flours, salt, and yeast. Add the water and, using your hands or a wooden spoon, mix until you have a sticky, wet dough–about 30 seconds. Cover the bowl and let sit at room temperature until the surface is doted with bubbles and the dough is more than doubled in size, 14-18 hours.
When the first rise is finished, generously dust a work surface with flour. Use a rubber spatula or bowl scraper to scrape the dough out of the bowl in one piece. Using lightly floured hands or a spatula, lift the edges of the dough in twoards the center. Tuck in the edges to make it round.
Place a tea towel on your work surface and generously dust with flour. Place dough on towel, seam down and dust top lightly with flour. Fold ends of towel loosely over dough and place in a warm, draft-free spot to rise for 2-3 hours. The dough is ready when it is almost doubled. If you gently poke it with your ginger, it should hold the impression. If it springs back, let it rise for another 20 minutes.
Half an hour before the end of the second rise, preheat the oven to 475 F with a rack positioned in the lower third, and place a covered 4 1/2 – 5 1/2 quart heavy pot in center of rack. Using pot holders, remove the preheated pot from the oven and uncover it. Unfold the tea towel quickly but gently invert the dough into the pot, seam side up. Be careful–the pot is hot! Cover the pot and bake for 30 minutes.
Remove the lid and continue baking until the bread is a deep chestnut color but not burnt, 15-30 minutes further. Use a heat-proof spatula to carefully life out of pot and place on rack to cool completely.

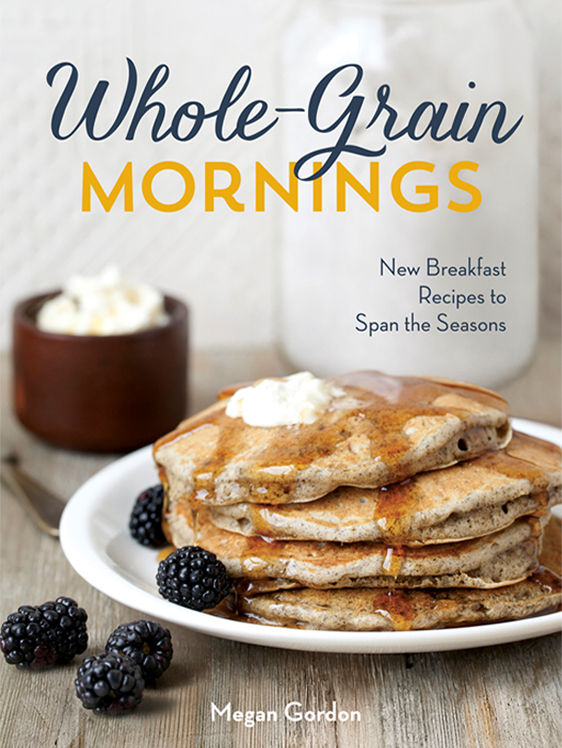 Megan's book!
Healthy Comfort Food
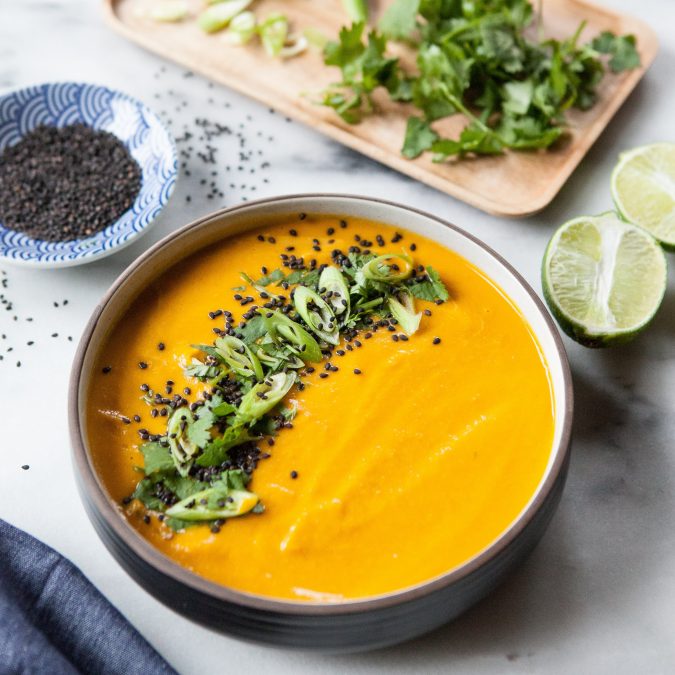
Thai Carrot, Coconut and Cauliflower Soup
People describe raising young kids as a particular season in life. I hadn't heard this until we had a baby, but it brought me a lot of comfort when I'd start to let my mind wander, late at night between feedings, to fears that we'd never travel internationally again or have a sit-down meal in our dining room. Would I ever eat a cardamom bun in Sweden? Soak in Iceland? I loved the heck out of our tiny Oliver, but man what had we done?! Friends would swoop in and reassure us that this was just a season, a blip in the big picture of it all. They promised we'd likely not even remember walking around the house in circles singing made-up songs while eating freezer burritos at odd hours of the day (or night). And it's true.
Oliver is turning two next month, and those all-encompassing baby days feel like a different time, a different Us. In many ways, dare I say it, Toddlerhood actually feels a bit harder. Lately Oliver has become extremely opinionated about what he will and will not wear -- and he enforces these opinions with fervor. Don't get near the kid with a button-down shirt. This week at least. He's obsessed with his rain boots and if it were up to him, he'd keep them on at all times, especially during meals. He insists on ketchup with everything (I created a damn monster), has learned the word "trash" and insists on throwing found items away on his own that really, truly are not trash. I came to pick him up from daycare the other day and he was randomly wearing a bike helmet -- his teacher mentioned he'd had it on most of the day and really, really didn't want to take it off. The kid has FEELINGS. I love that about him, and wouldn't want it any other way. But, man it's also exhausting.

Cheesy Quinoa Cauliflower Bake
I just finished washing out Oliver's lunchbox and laying it out to dry for the weekend. My favorite time of day is (finally) here: the quiet of the evening when I can actually talk to Sam about our day or sit and reflect on my own thoughts after the inevitable dance party or band practice that precedes the bedtime routine lately. Before becoming pregnant for the second time, I'd have had a glass of wine with the back door propped open right about now -- these days though, I have sparkling water or occasionally take a sip from one of Sam's hard ciders. Except now the back door's closed and we even turned on the heat for the first time yesterday. The racing to water the lawn and clean the grill have been replaced by cozier dinners at home and longer baths in the evening. You blink and it's the first day of fall.

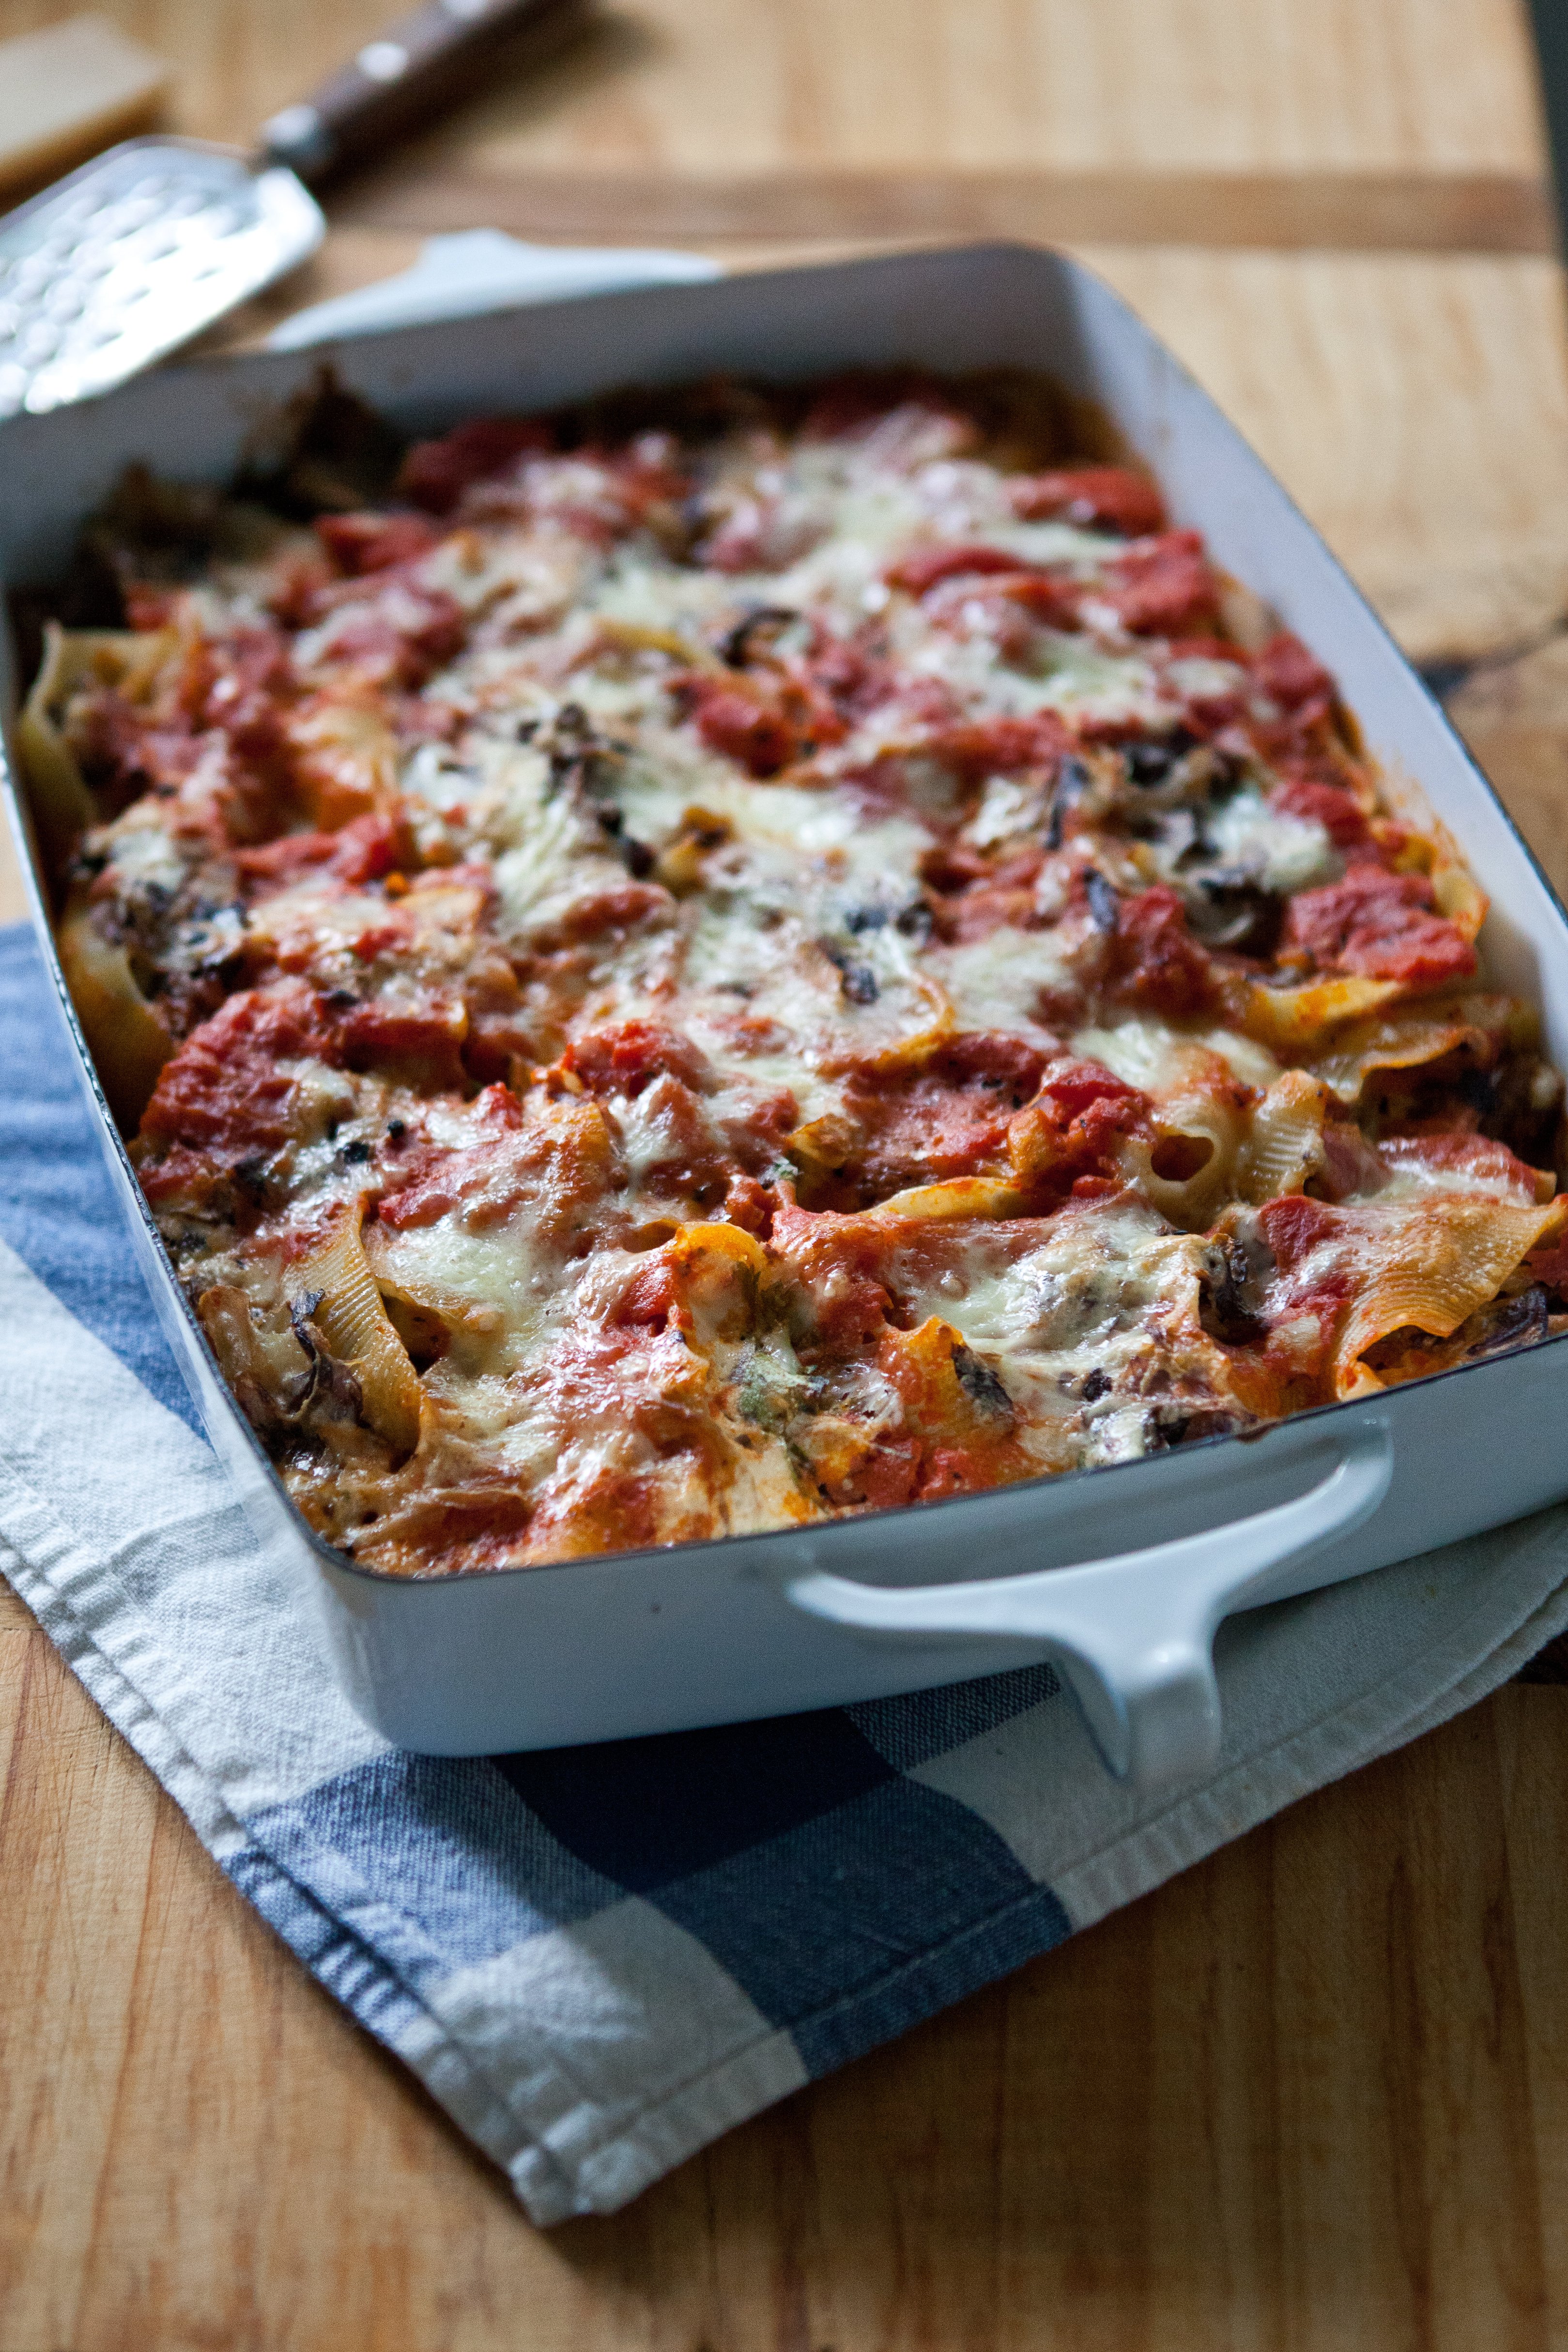
Stuffed Shells with Fennel and Radicchio
I'd heard from many friends that buying a house wasn't for the faint of heart. But I always shrugged it off, figuring I probably kept better files or was more organized and, really, how hard could it be? Well, I've started (and stopped) writing this post a good fifteen times which may indicate something. BUT! First thing's first: we bought a house! I think! I'm pretty sure! We're still waiting for some tax transcripts to come through and barring any hiccough with that, we'll be moving out of our beloved craftsman in a few weeks and down the block to a great, brick Tudor house that we wanted the second we laid eyes on it. The only problem: it seemed everyone else in Seattle had also laid eyes on it, and wanted it equally as much. I'm not really sure why the homeowner chose us in the end. Our offer actually wasn't the highest, but apparently there were some issues with a few of them. We wrote a letter introducing ourselves and describing why we'd be the best candidates and why we were so drawn to the house; we have a really wonderful broker who pulled out all the stops, and after sifting through 10 offers and spending a number of hours deliberating, they ended up going with ours. We were at a friend's book event at the time when Sam showed me the text from our broker and I kind of just collapsed into his arms. We were both in ecstatic denial (wait, is this real?! Did we just buy a house?) and celebrated by getting chicken salad and potato salad from the neighborhood grocery store and eating it, dazed, on our living room floor. Potato salad never tasted so good.

Smoky Butternut Squash and Three Bean Chili
If your house is anything like ours, last week wasn't our most inspired in terms of cooking. We're all suffering from the post-election blues -- the sole upside being Oliver's decision to sleep-in until 7 am for the first time in many, many months; I think he's trying to tell us that pulling the covers over our heads and hibernating for awhile is ok. It's half-convincing. For much of the week, instead of cooking, there'd been takeout pizza and canned soup before, at week's end, I decided it was time to pour a glass of wine and get back into the kitchen. I was craving something hearty and comforting that we could eat for a few days. Something that wouldn't remind me too much of Thanksgiving because, frankly, I can't quite gather the steam to start planning for that yet. It was time for a big bowl of chili.

To Talk Porridge
Porridge is not the sexiest of breakfasts, it's true. It doesn't have a stylish name like strata or shakshuka, and it doesn't have perfectly domed tops like your favorite fruity muffin. It doesn't crumble into delightful bits like a good scone nor does it fall into buttery shards like a well-made croissant. But when you wake up and it's 17 degrees outside (as it has been, give or take a few, for the last week), there's nothing that satisfies like a bowl of porridge or oatmeal. It's warm and hearty and can be made sweet or savory with any number of toppings. The problem? Over the years, it's gotten a bad rap as gluey or gummy or just downright boring or dutiful -- and it's because not everyone knows the secrets to making a great pot of warm morning cereal. So let's talk porridge (also: my cookbook comes out this month! So let's take a peek inside, shall we?)
Mary
I love that advice - no matter the situation: "Just turn off your mind and go. Move forward." Thanks, Megan!
And to the bread. Beautiful photo with the bread, jam + butter. Don't you think Lahey deserves some type of Nobel? I'm going to try your way next time - adding more whole wheat flour. During the holidays King Arthur offered free shipping - since shipping is normally charged by the pound - I went a bit overboard and ordered 25 lbs of flour. Surprisingly, I've used half - largely making loaf after loaf of Jim's bread. It makes a great gift too.
Doreen
I learned about Lahey's method only yesterday and seeing your post today is a sign - I must make this bread! Excellent blog, beautiful photographs, I look forward to each and every posting.
Stephanie
Megan - another beautiful post. And what a crazy coincidence - my dad emailed me yesterday asking for this recipe. I make this bread a LOT, and he does too, but he'd lost the link to my old blog. I literally sent this to him last night - whoa. Love the bridge story! You go girl!
megang
Amazing! I think a lot of people have been in bread-baking mode lately...something so satisfying about putting a little flour, water, and yeast together and a magic happens! That's awesome your dad bakes it as well!
Heavenly Housewife
What a stunning loaf of bread. I think there is nothing more satisfying than making your own bread, and you've done such a beautiful job. It looks so perfect.
*kisses* HH
El
The bread looks delicious. I'll have to give this a try. Glad you survived yoga!
Danielle
What a gorgeous loaf!! After I'm done with Reinhart's book I suppose I know whose breads I'm going to be baking next :)
That is so awesome that you did a bridge pose from standing. I'm barely surviving doing them from lying on my back - no muscle memory in my shoulders + screaming thigh muscles = a dread everytime I get to that pose in my practice. Totally agree about not thinking too much and learning to trust our bodies - it knows a lot more than we think it does!
MommaB
My yoga instructor once told me that the pose I liked the least, was the one I needed to do the most! 🙏
megang
Oh gosh how true is that?! At the very least, it's the one that teaches us the most patience, right?!
Shannalee
Beautifully done and beautifully written. Cheering for you! Hurrah! You've totally conquered bread, I'd say!
Janice
Uh oh. That's the bread that catapulted me into the 5 Minutes a Day breads. Which then led me to The Bread Baker's Apprentice Challenge. What I'm saying is that yeast bread baking is as addictive as yoga - a slippery slope, to be sure. Congratulations on both the bread and the pose. :)
Wizzythestick
Great post on yoga and about bread! I have seen this recipe about for some time now but haven't made it because of trust issues :-) I think it's time now for me to let go and dive into this project.
Manggy
If you only knew! I've tried and tried to get thing bread thing on straight but it never seems to. Always soggy and weird underneath, even with my hot baking stone. Maybe I should try this recipe! :)
a for aubergine
I seriously need to try making this bread!
Alejandra
I don't know why I haven't made this recipe yet. I've read about it so many times and I keep resisting. I think I just need to do it.
Your photos are beautiful!
A Canadian Foodie
I have had exactly the same experience with bread baking. I started working the dough instead of kneading it - and a very wet dough - as I got really hooked on Richard Bertinet's Books Dough and Crust... but found, unless I TRUSTED (or believed) that what he said would happen, I would give up too soon. I eventually, (just last week) took one of his bread baking classes, with he as the instructor, t his Cookery School in Bath on our recent trip to London. The highlight of my trip. I am trying to get the post up. A life altering experience, for me. Isn't one's relationship with bread making intimate - such an ancient tradition. I value your comments and learning here, and will be back to make this dough, too.
Thank you!
:)
Valerie
Dana
Well doesn't that just look like a lovely loaf! Lahey's method sounds really interesting, and the pictures really show the results.
I've definitely had some bread failures in the past, perhaps it's time to get back into bread baking.
Chez Us
Great post about trust - love it! Panic would have set in with during that yoga pose as well - my body is so NOT flexible. I am glad you went with it as the end result was this beautiful bread for us all to enjoy.
Love the photos!! ;)
Staci
Megan, I just did my very first standing bridge pose last night! Scary but very satisfying. And while I don't cook or bake, your blog makes me WANT to cook and bake. :)
megang
Thanks, Stace! And congrats on the standing bridge pose--I bet those students of yours could get behind a little baking (hint, hint) :)
Samosa
Excited to try this!
Carra young
This loaf looks to die for! Yummm! Part of me can't wait to get home from my vacation, get back to my kitchen and hop right to trying out this recipe! But most of me just wants to continue on down the road in the RV! Xo
allison lemons
Ah, no knead bread. The only time it didn't work out for me was when I was trying to show off my bread-making skills to my family, who didn't believe I could do it. Still can't believe it didn't work - it always works! Beautiful photos Megan!
Staci
I just sent this post to my dad and sister. We went to Seattle probably about 10 years ago, and we ate our way through that amazing city -- my dad had brought a list of the top ten restaurants at the time, and we just went down the list. Clearly we need to go back. :)
megang
Hi Staci! Yes, it's a really amazing food city. I was telling my mom that we should've stayed one more night because it's always so hard to narrow down our restaurant choices to two nights. But easier jaunt up for us than it is for you...I think you'd love the city though. It's changed a lot in the past few years--one of my new favorite places.
Staci
Oops...I meant for that comment to go under the Seattle post.
Diane
This bread looks H-E-A-V-E-N-L-Y. And even easier than the Mark Bittman almost no-knead bread recipe - have you tried that one? It's almost exactly the same except that there is a bit of beer involved and 8-10 kneads to the dough between the first and second risings. Anywhoo, I'll be trying Lahey's recipe next!
megang
Oooh, Diane--I haven't tried Mark Bittman's recipe (although I love him). Will have to check it out! Thanks for the blog compliments. I think you'll love the bread :)
Mardi@eatlivetravelwrite
What a beautiful post Megan. You are right - the first time I actually managed wheel was when I was totally no thinking about it and just did it. Normally, this Taurus likes to invent all sorts of reasons why I shouldn't even bother to try since I can't do it anyway or I am picturing myself falling on my head. Come to think of it, haven't tried for a while - you may have inspired me to "just do it".
Funnily, bread is one of my baking nemeses and I tend to overthink everything there too. The few times bread and I have had a happy meeting were when I didn't think about it too much. Macarons are like that too.
I think I totally need a Le Creuset so I can try this recipe. Perhaps I should be making hints to all my friends for my big birthday coming up!
megang
Just so you know, Mardi, you can make this in a cast-iron pot, too. It'd be perfect and much, much cheaper than a Le Creuset.
And I promise you'll be able to swing this recipe--it's pretty fool proof. Let me know how you like it!
Judy
Oh dear. I dont think my oven goes up to 475F. The mini thing probably goes up to 220C, max?
megang
Hmm, little oven?
Jim
Found your blog while looking for how people have had success with Jim Lahey's method. Thank you for sharing your experience and photos. I'm sure my spine would crack if attempting the yoga pose you describe, but I'm confident the bread will be a winner.
Blakely
Has anyone tried this with all whole wheat flour?
megang
Hi Blakely. You probably don't want to use all whole wheat flour for this recipe, although I've used King Arthur's White Whole Wheat with much luck. Try that. Let me know what you think!
Mary
Just made this bread and it is one gorgeous and delicious, chewy, crunchy loaf! Did a couple of things differently, mostly because I hated the mess of dough in a tea towel. I used a small, oval dutch oven (perfect size to make a beautiful oval loaf). Instead of the second rise in a towel, I inserted parchment paper into my dutch oven and put the dough in that to rise. When it was time to put the dutch oven in the oven, I took out the dough by simply lifting the parchment. Also, I lowered the baking temperature to 425 once I put the dough in the heated dutch oven. Even after lowering the temp, it only took 30 min. for the loaf to reach 190 degrees.
megang
Aw, thanks for the feedback/tips, Mary. I'll try the parchment next time around!
David
"1 1/t tsp. (8 g) table salt"
what is the 1/5 supposed to be?
megang
Hi David-
Wow, I can't believe that typo lived on for so long. So sorry for any confusion. Should be 1 1/4 tsp. and should be updated now. Enjoy the bread. ~m
David
sorry, mistyped. what is the "1/t" supposed to be?
SMB
Using this recipe for the 2nd time this weekend. Thank you!
megang
So happy to hear it, Sharyl!
NusIrorse
Можете поздравить меня я купил себе мечту и буду управлять ей :). toyota - управляй мечтой. а купил я себе camry и очень счастлив :) урА!!!
Cheryl
I've made this bread several times now with the exception that sometimes I add a wee bit of wheat gluten, and I always add 1 1/2 tablespoons of honey. Not sure why or where I saw that, but it is good.
Anyway, my bottom crust is always hard, almost too hard to cut or chew. I can cut it with a bread knife, but it is difficult. I bake my bread at 425 degrees in a cast iron dutch oven. Other than that the bread itself is magnificent. The crumb is nice and tasty. Any suggestions?
megang
Hi, Cheryl-
Nice to hear from you and glad that you're enjoying the bread. You know, I haven't baked this bread in far too long so I'm going to give it a go here in the next week or so and see how my bottom crust is. As I recall, it was certainly nice and crusty but it shouldn't be too firm to cut. My first guess would be the pot you're cooking it in, but a cast iron Dutch oven should be perfect. Are you setting that on top of a baking sheet? If so, I'd set it right on the oven rack itself. I wouldn't mess with the oven temperature, but I wonder if you took it out 5-6 minutes early -- if the top still looks nice and dark / golden I wonder if the bottom will improve a bit? Let me know what you discover if you make it again ... and I'll do the same. Happy baking, ~Megan
Cheryl
Thanks Megan, I actually have my second loaf in 2 days sitting on the counter right now. I will check it 5-6 minutes earlier tomorrow. I might even check the internal temperature a little sooner then that. Not sure though. Does peeking in the pot too often affect the steam and such. Hmm, probably not towards the end. It should be done rising by then and the crust should be formed right? It will be a perfect time to experiment because I will have the 2 loaves to compare. I'll let you know what happens. In reference to your question I just sit the cast iron dutch oven on the racks. I don't place it on a stone. I try to have the pan sitting towards the middle of the oven. Thanks again - I'll keep you posted.
Cheryl
Well, I baked my second loaf for only 30 minutes. The internal temperature was already at 200 degrees. The bottom crust was certainly easier to cut. The top crust wasn't as crisp as before which disappointed my husband, but it was a nicer balance. The loaf was still nicely browned and just as tasty as ever. This is still one of my favorite recipes. When I make an Italian dish I toss in some Italian spices. I'll have to play around with some other variations too. Thanks for the recipe and working out all of the flour ratios. My loaves still don't have the lovely air pockets that your loaf does in the picture. I found leaving out the gluten that I had been adding helped a little with that. Thanks again!
megang
Darn, Cheryl. Well now I'm really going to have to try my hand at a loaf again and see how mine comes out. I don't remember this issue but like I said, it's been a little while ... I'll report back once I get to it! Thanks so much for your thoughts / reports ... and glad that you still are enjoying the bread enough to bake it again. Have a great weekend, Megan
Diane
Just tried this. Not sure if I succeeded. My loaf is only 8 inches and isn't very high. Was it supposed to poof? Maybe only 2 1/2 inches high. But was having trouble I think I the rising too. Oh well, try try again.
megang
Hi, Diane-
Hmm, the height will depend a little on the size of the pot / vessel you let it rise / bake it in. Also, there are many factors that can affect the rise of bread, from temperature to age of yeast. I'd get yourself some nice, fresh yeast and make sure you have a good warm spot to let it rise and allow it to rise for long enough ... hopefully it still tastes great! ~Megan
Melanie
I have made this loaf a few times nown and it gets better every time - working on getting the crumb I see in the photo but my loaves are much more dense. Giving more time for first rise right now. Question - why no scoring of the loaf? I heard this also helpsaid give it a little lift. Thanks!
megang
Hi, Melanie! Yay, so glad you're enjoying it. You know, good question. I don't know why he doesn't call for scoring the loaf and I do love the way that looks. I would go ahead and try it next time - can't hurt! Have a great weekend ~Megan
Kora
Hello! I just made this bread. Might you offer some insight on why it ended up so flat? I wish I could post a picture. It's probably less than 2 inches high at it's highest point. I followed the instructions.
megang
Hi, Kora. Oh that is very odd. I've made this recipe A LOT and never had an issue (although I will say it yields a squattier loaf - mine was probably about 3-4 inches at max. I'd say it sounds like maybe your yeast had an issue: maybe older or just didn't react? So sorry you had that experience with the recipe; i hope next time it works out better for you!